Connecting to Google Data Studio
IntegrationsHow to connect Google Data Studio to your AccuRanker account
How do I connect Google Data Studio to AccuRanker?
Step 1)
Go to “Integrations” -> Google Data Studio, and click on the data source link.

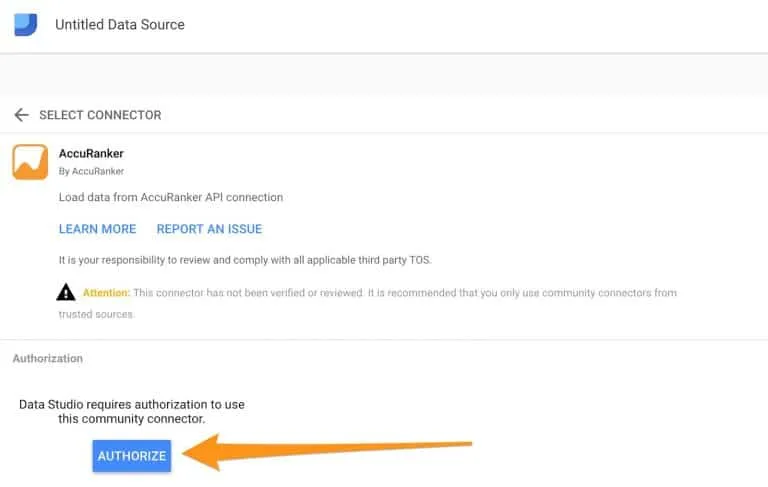
Step 2)
If this is your first time using Google Data Studio, you will be prompted to do the basic setup.
You will have to authorise the use of the connector and data by logging in and confirming the action.
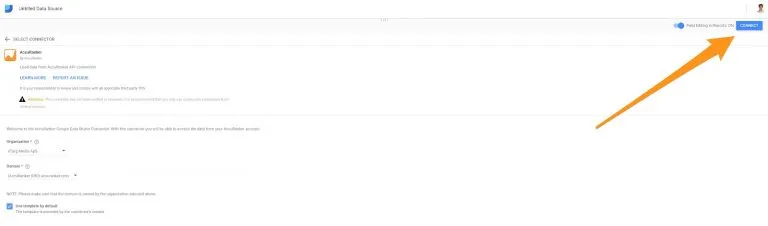
Step 3)
Next you need to grant Google Data Studio the ability to pull data from AccuRanker.
Simply log into your AccuRanker account to authorise this.

After this you should receive the message: “Success! You can close this tab”.
Step 4)
The organisation list consists of your own account and any sub-accounts you may have.
Make sure that the domain you choose relates to the correct organisation, otherwise you will receive an error message.
Once you select which account and domain you want to export from, simply click “Connect”.
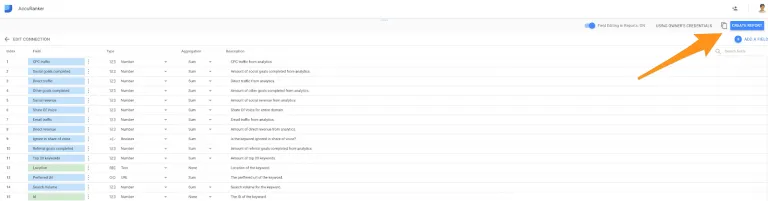
Step 5)
All the fields are added by default, so you can safely click “Create Report”. If you haven’t connected Google Data Studio to Google Drive, you will be prompted to do so.
Read More
Still need help?
Customer support
Our live support team is ready to assist you with any issues.