

How to Create Scheduled Reports
ReportsLearn how to automate your reporting by scheduling reports to be sent daily, weekly, or monthly
Scheduled reports let you automate your reporting process instead of creating and sending reports manually each time. You can choose what to include, how often the report should be sent, and who should receive it.
How to Create a Scheduled Report
Step 1
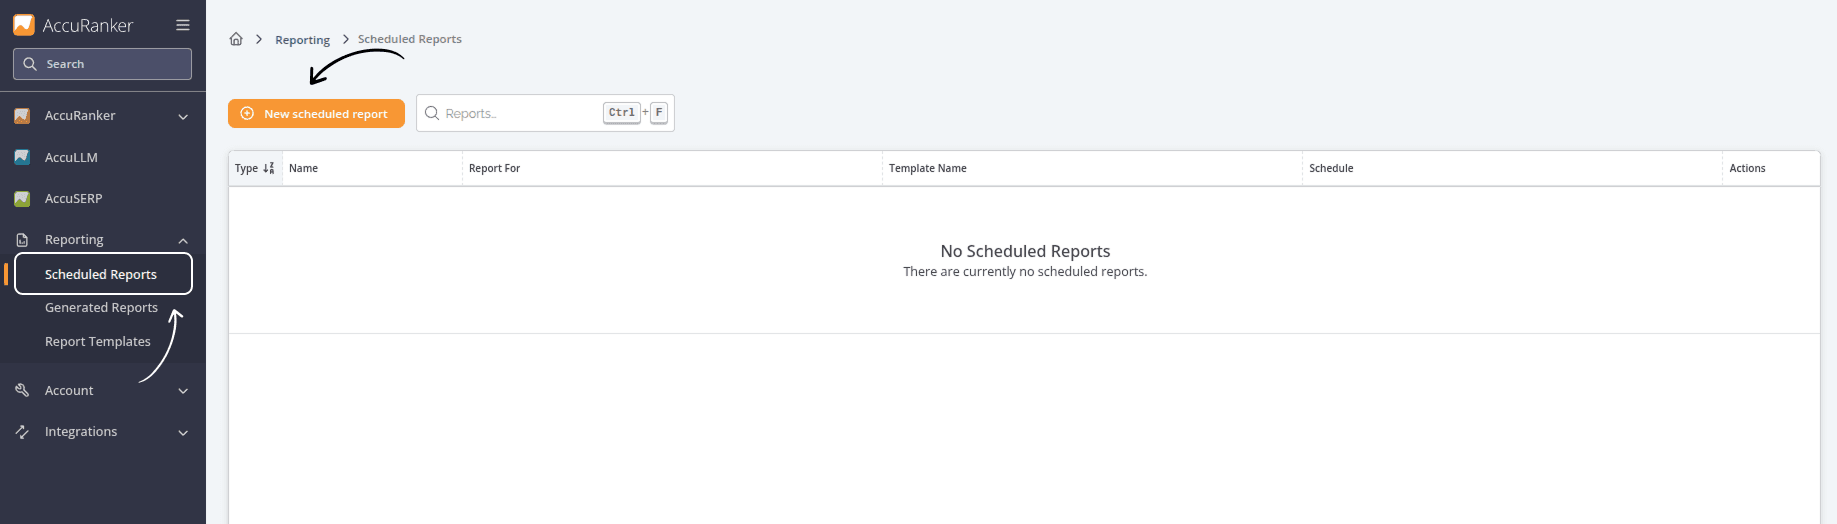
- Go to Reporting in the sidebar.
- Select Scheduled Reports.
- Click New scheduled report.
Step 2
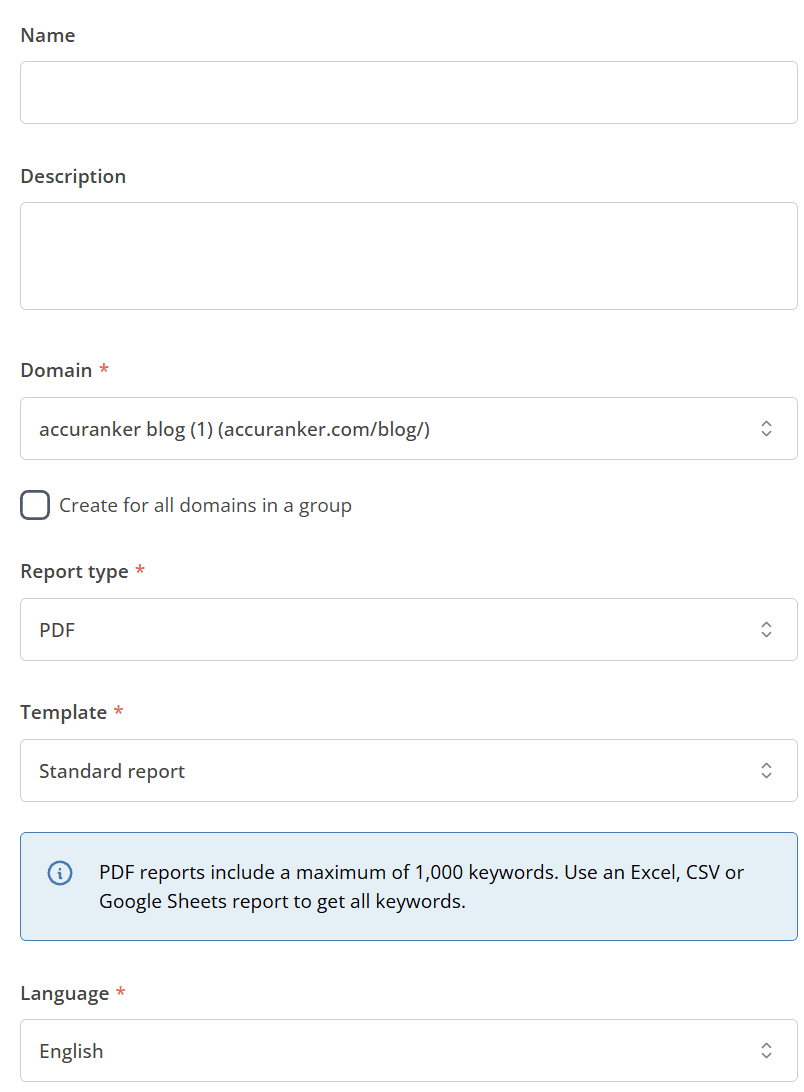
Select the Domain you want to report on, then configure the report:
- Report Type: Choose PDF, CSV, or Sheets.
- Language: Select the language for the report.
- Template: Choose the template you want to use.
Step 3
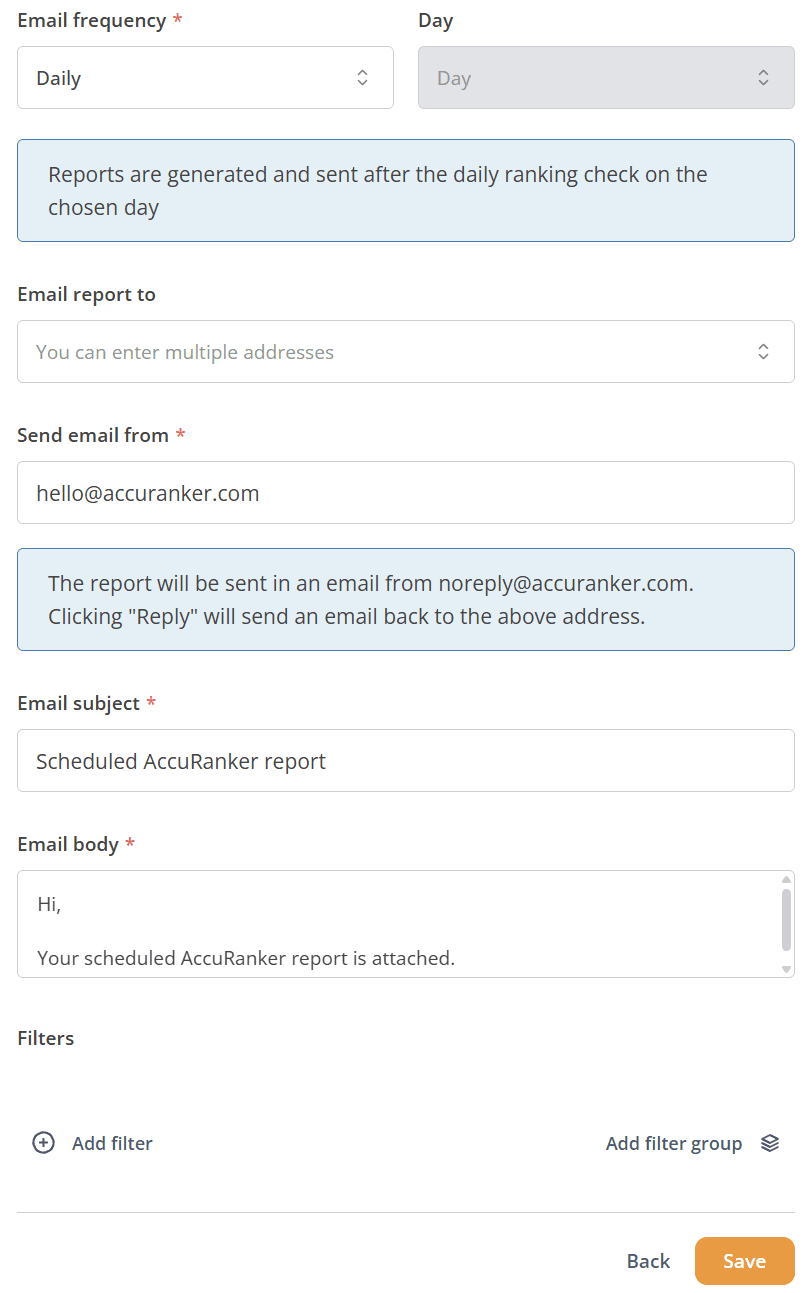
Select the schedule for your report.
You can schedule reports to be sent daily, weekly, or monthly and specify the date.
The report will be sent after your keywords have been updated for the day.
Complete the remaining required fields, including:
- Who should receive the report
- Which email address you want to send the report from
- The email subject
- The body text.
You can also use filters. The available filtering options are the same as those in the Keywords list.
If you want to add your own logo to your reports, see How to Create Branded Reports.
Related help guides
How to Create Branded Reports
How to Create Report Templates
How to Create and Share Public Reports
Still need help?
Customer support
Our live support team is ready to assist you with any issues.